git cz的配置
- 安装: npm install -g commitizen
- 安装:pnpm install -D cz-git
- package.json文档中
"config": {
"commitizen": {
"path": "node_modules/cz-git"
}
}
module.exports = {
rules: {
},
prompt: {
messages: {
type: '选择你要提交的类型 :',
scope: '选择一个提交范围(可选):',
customScope: '请输入自定义的提交范围 :',
subject: '填写简短精炼的变更描述 :\n',
body: '填写更加详细的变更描述(可选)。使用 "|" 换行 :\n',
confirmCommit: '是否提交或修改commit ?',
},
types: [
{
value: 'feat',
name: 'feat: 新增功能 | A new feature',
emoji: '✨',
},
{ value: 'fix', name: 'fix: 修复缺陷 | A bug fix', emoji: '🐛' },
{
value: 'docs',
name: 'docs: 文档更新 | Documentation only changes',
emoji: '📄',
},
{
value: 'style',
name: 'style: 代码格式 | Changes that do not affect the meaning of the code',
emoji: '💄',
},
{
value: 'refactor',
name: 'refactor: 代码重构 | A code change that neither fixes a bug nor adds a feature',
emoji: '♻️',
},
{
value: 'perf',
name: 'perf: 性能提升 | A code change that improves performance',
emoji: '⚡️',
},
{
value: 'test',
name: 'test: 测试相关 | Adding missing tests or correcting existing tests',
emoji: '✅',
},
{
value: 'build',
name: 'build: 构建相关 | Changes that affect the build system or external dependencies',
emoji: '📦️',
},
{
value: 'ci',
name: 'ci: 持续集成 | Changes to our CI configuration files and scripts',
emoji: '🎡',
},
{
value: 'revert',
name: 'revert: 回退代码 | Revert to a commit',
emoji: '⏪️',
},
{
value: 'chore',
name: 'chore: 其他修改 | Other changes that do not modify src or test files',
emoji: '🔨',
},
],
useEmoji: true,
scopes: [
['components', '组件相关'],
['hooks', 'hook 相关'],
['utils', 'utils 相关'],
['element-ui', '对 element-ui 的调整'],
['styles', '样式相关'],
['deps', '项目依赖'],
['auth', '对 auth 修改'],
['other', '其他修改'],
].map(([value, description]) => {
return {
value,
name: `${value.padEnd(30)} (${description})`,
}
}),
allowCustomScopes: true,
skipQuestions: ['body', 'breaking', 'footer'],
subjectLimit: 100,
allowBreakingChanges: ['feat'],
},
}
mock 数据
- 当后端接口还没有的时候,这个用于前端自己造数据
- 安装依赖地址
- 安装:pnpm install -D vite-plugin-mock mockjs
pnpm install -D vite-plugin-mock@2.9.6
配置viteMockServe
import { viteMockServe } from 'vite-plugin-mock'
import vue from '@vitejs/plugin-vue'
export default ({ command })=> {
return {
plugins: [
vue(),
viteMockServe({
localEnabled: command === 'serve',
}),
],
}
}
- localEnabled如果有波浪线报错
- 解决办法:卸载 vite-plugin-mock插件,然后重新安装2.9.6版本的插件
建立mock/user.ts文件夹
function getUser() {
return [
{
userId: 1,
avatar:
'https://wpimg.wallstcn.com/f778738c-e4f8-4870-b634-56703b4acafe.gif',
username: 'admin',
password: '111111',
desc: '平台管理员',
roles: ['平台管理员'],
buttons: ['cuser.detail'],
routes: ['home'],
token: 'Admin Token',
},
{
userId: 2,
avatar:
'https://wpimg.wallstcn.com/f778738c-e4f8-4870-b634-56703b4acafe.gif',
username: 'system',
password: '111111',
desc: '系统管理员',
roles: ['系统管理员'],
buttons: ['cuser.detail', 'cuser.user'],
routes: ['home'],
token: 'System Token',
},
]
}
export default [
{
url: '/api/user/login',
method: 'post',
response: ({ body }) => {
const { username, password } = body
const checkUser = getUser().find(
(item) => item.username === username && item.password === password,
)
if (!checkUser) {
return { code: 201, data: { message: '账号或者密码不正确' } }
}
const { token } = checkUser
return { code: 200, data: { token } }
},
},
{
url: '/api/user/info',
method: 'get',
response: (request) => {
const token = request.headers.token
const checkUser = getUser().find((item) => item.token === token)
if (!checkUser) {
return { code: 201, data: { message: '获取用户信息失败' } }
}
return { code: 200, data: { checkUser } }
},
},
]
测试一下mock是否配置成功
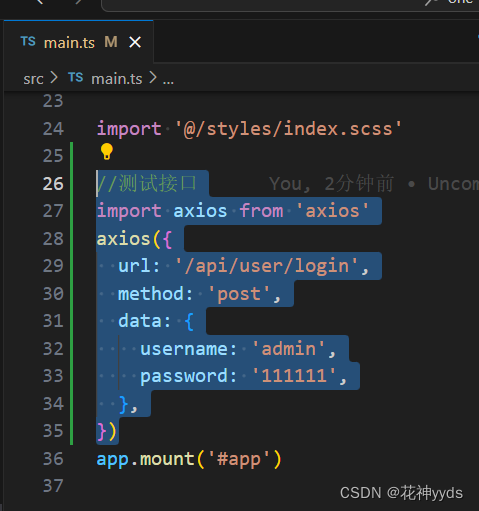
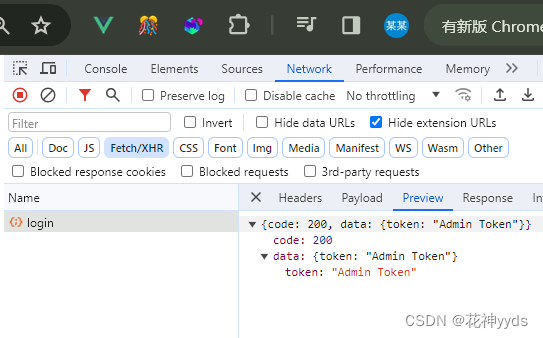
- 好的,看着可以使用,那么正式在项目中使用,这里main.ts就先删除
axios二次封装
-
为更好的与后端进行交互,需要使用axios插件实现网络请求
-
一般对axios进行二次封装
-
使用请求拦截器,可以在请求拦截器中处理一些业务(开始进度条、请求头携带公共参数)
-
使用响应拦截器,可以在响应拦截器中处理一些业务(进度条结束、简化服务器返回的数据、处理 http 网络错误)
import axios from 'axios'
import { ElMessage } from 'element-plus'
let request = axios.create({
baseURL: (import.meta as any).env.VITE_APP_BASE_API,
timeout: 5000,
})
request.interceptors.request.use((config) => {
return config
})
request.interceptors.response.use(
(response) => {
return response.data
},
(error) => {
let msg = ''
let status = error.response.status
switch (status) {
case 401:
msg = 'token过期'
break
case 403:
msg = '无权访问'
break
case 404:
msg = '请求地址错误'
break
case 500:
msg = '服务器出现问题'
break
default:
msg = '无网络'
}
ElMessage({
type: 'error',
message: msg,
})
return Promise.reject(error)
},
)
export default request
解决env报错问题,ImportMeta”上不存在属性“env”

- import.meta.env.VITE_APP_BASE_API,报错类型“ImportMeta”上不存在属性“env”
- 方法一:忽略类型校验
baseURL: import.meta.env.VITE_APP_BASE_API,
baseURL: (import.meta as any).env.
- 其余方法我这试着没生效,类似 “types”: [“vite/client”],
统一管理相关接口
新建api/index.js
import request from '@/utils/request'
import type { setlogin, getloginDate } from './type'
enum API {
LOGIN_URL = '/user/login',
}
export const getLogin = (data: setlogin) =>
request.post<any, getloginDate>(API.LOGIN_URL, data)
import { getLogin } from '@/api/index'
const getlogin = () => {
  getLogin({ username: 'admin', password: '111111' })
}
路由的配置
- 安装:pnpm install vue-router
建立router/index.ts
import { createRouter, createWebHashHistory, RouterOptions } from 'vue-router'
import { constantRoute } from './routers'
let router = createRouter({
history: createWebHashHistory(),
routes: constantRoute,
scrollBehavior() {
return {
left: 0,
top: 0,
}
},
})
export default router
将路由进行集中封装,新建router.ts
import { RouteRecordRaw } from 'vue-router'
export const constantRoute: RouteRecordRaw[] = [
{
path: '/login',
name: 'login',
component: () => import('@/view/login/index.vue'),
},
{
path: '/',
name: 'home',
component: () => import('@/view/home/index.vue'),
},
{
path: '/404',
name: '404',
component: () => import('@/view/404/404.vue'),
},
{
path: '/:pathMatch(.*)*',
redirect: '/404',
name: 'Any',
},
]
main.ts的vue-router的挂载
import router from './router'
app.use(router)
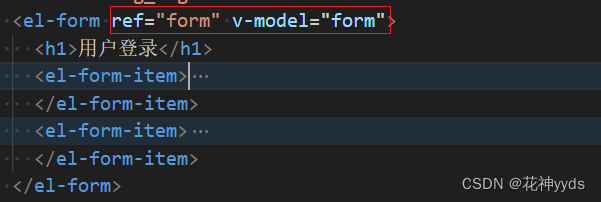
解决Vue3的el-input无法输入
- 原因Vue3里面这两个值不能相同